Fullstack Kotlin Developer - part 1


When perusing job listings, you’ll often come across the ubiquitous most common phrase “Fullstack developer wanted”. If you are a mobile developer with a good Kotlin background, you are about one step to becoming a full-stack Kotlin developer. That superpower is at your fingertips, so grab it!
In this blog series, I would like to show you how to create a Kotlin multiplatform project based on compose multiplatform that will share common business logic and UI with Android, iOS, and Web applications. Moreover, we will use the same shared business logic on the Backend side of our KTOR application. We can share API interfaces, domain objects, validation rules, and more!
So… as it is widely known, the beginnings are taught, but the result of your work will be astonishing. Let me guide you through the project setup that will be our base for further development.
Let’s start from scratch…
… and use the project configuration wizard from JetBrains. Check Android, iOS, and Backend, fill in the project name and ID, and click download. Run this project from the latest version of AndroidStudio or IntelliJ.

In our Kotlin Multiplatform project, we need to use the latest `compose-plugin` with warm support. Which is still experimental (when I am writing this blog post, the most recent version is 1.6.0-alpha01). Add it to the project, and sync it. The compose plugin version is in the gradle folder in the libs.versions.toml, where all dependencies are located.
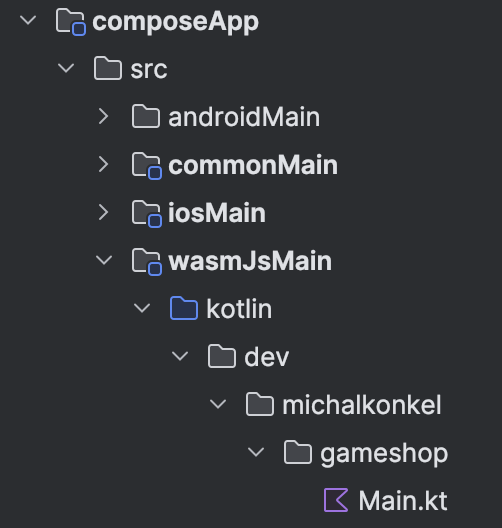
While the project is syncing, we can inspect the generated template. It is divided into two main sections: shared and composeApp. ComposeApp is for the code holding our applications’ Compose Multiplatform code (mostly UI).
These subfolders correspond to the targets for which we will be launching the application:
- commonMain is shared code for all platforms
- IosMain is for iOS-specific code e.g. apple cryptography
- androidMain is for Android code
- WasmJsMain is for WebAssembly code
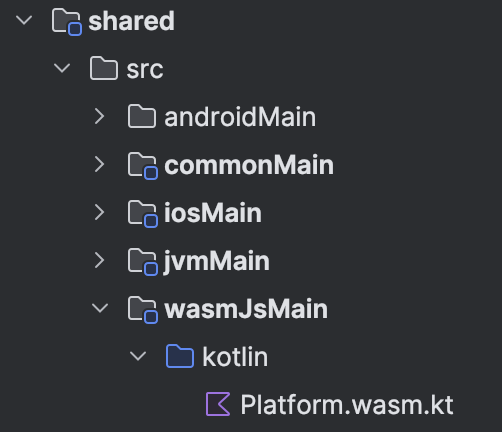
The same rules apply to the shared module where we will hold our business/domain logic, API requests, and responses, or even the HTTP client. If there is a need to add specific behaviors depending on the platform, we can also use some of the generated subfolders.
The server module is a place where the KTOR backend application is located. It is independent and does not use code from composeApp or shared. If we properly structure our code with some additional modules, then we can share part of it even with the backend application (for example, some API models).
Last but not least…
… is the iOSApp module, which contains an iOS application. It’s an entry point for running the application on Apple devices and a place for the SfiftUI code to be added (if needed).
We can add one thing in the composeApp build.gradle.kts that will run our desired browser for the wasm application; we need to locate the wasmJs code block and add Google Chrome dev (or other) as a starting point.
wasmJs {
moduleName = “gameshopwasmapp”
browser {
commonWebpackConfig {
outputFileName = “gameshopwasmapp.js”
devServer = (devServer ?: KotlinWebpackConfig.DevServer()).apply {
open = mapOf(
“app” to mapOf(
“name” to “google chrome dev”
)
)
}
}
}
binaries.executable()
}
Before we launch the WASM application, we need to enable its support in our browser. Please follow these instructions.
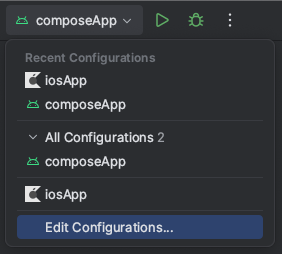
Now, we can use the ./gradlew :composeApp:wasmJsBrowserDevelopmentRun command to run our application in the browser. To run the Android and iOS apps, you must start proper AndroidStudio configurations.
If everything goes well, you can see something like this: click the button to see how the UI changes.
Running the generated project was straightforward. We almost did nothing to make it run. This is a great point to start your project. Get benefits from writing code once and covering three platforms. In the next post, we will add some code to the backend application based on my previous post about the KTOR – we will extend the existing GameShop by the mobile and frontend applications.
In the following articles, we will discuss a.o. Ktor Server and Client for the application.
Stay tuned and follow us for more!